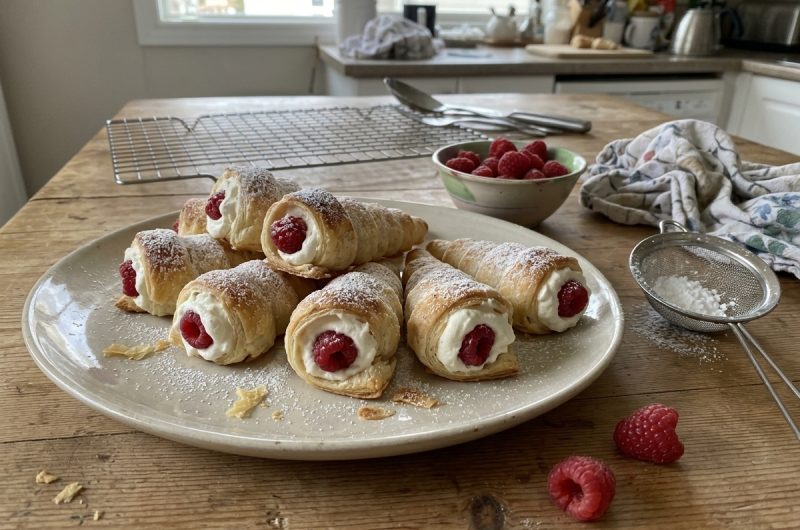

Gluten Free Cream Horns are delicate puff pastry desserts shaped into cones, baked until golden and crisp, and filled with lightly sweetened whipped cream. Their flaky outer layers contrast beautifully with the smooth, creamy filling, creating a bakery-style treat that is perfect for afternoon tea, family gatherings, celebrations, and special occasions. With gluten-free puff pastry and a few simple ingredients, you can prepare these elegant pastries at home without sacrificing their traditional appearance or delicious texture.
This homemade cream horn recipe includes an extra layer of melted chocolate inside each pastry cone, adding a rich chocolate flavor while helping to create a barrier between the pastry and the cream. Fresh raspberries provide a bright, fruity finish that balances the sweetness of the filling. You can also decorate the horns with grated chocolate, other fresh berries, or a light dusting of icing sugar to suit your preferences.
One of the best things about gluten-free cream horns is that they look impressive without requiring complicated baking techniques. Ready-rolled gluten-free puff pastry makes the preparation easier, while metal cream horn moulds give the pastries their distinctive cone shape. Once you understand how to wrap the pastry around the moulds and remove them safely after baking, assembling these sweet treats becomes a straightforward process.
Why You Will Love This Gluten Free Cream Horn Recipe
These gluten-free cream horns offer the familiar taste and texture of a traditional cream-filled pastry while making use of gluten-free ingredients. The pastry becomes golden and crisp in the oven, and the whipped cream adds a soft, airy centre. A coating of chocolate introduces another layer of flavor, making each bite taste rich and satisfying without requiring an elaborate filling or decorative finish.
Another advantage is the flexibility of the recipe. You can keep the horns simple with whipped cream and raspberries, or experiment with different fruits and toppings to create a dessert that suits the occasion. Strawberries, blueberries, blackberries, and red currants are all suitable options. For chocolate lovers, adding grated chocolate to the cream or dipping the open ends of the pastry cones into melted chocolate creates an even more indulgent dessert.
These pastries are also useful when you want to prepare individual desserts for guests. Each horn can be filled and decorated separately, making portioning easy for afternoon tea, birthday celebrations, holiday gatherings, or dessert tables. Their attractive shape gives them a special-occasion appearance, but the ingredients and method are simple enough for an ordinary weekend baking project.
What Makes These Cream Horns Special?
The combination of crisp pastry, smooth cream, chocolate, and fresh fruit makes this dessert particularly enjoyable. Puff pastry develops thin, delicate layers as it bakes, giving the outside a light crunch. The cream filling provides a soft contrast, while the chocolate coating adds depth and a subtle sweetness that complements the other ingredients.
The chocolate lining also serves a practical purpose. Cream contains moisture, which can gradually soften baked pastry when the two remain in contact. A thin coating of chocolate creates a partial barrier that can help the cones retain their crispness for longer. Although it does not prevent softening indefinitely, this small step can be useful when preparing desserts for a gathering or special occasion.
Fresh raspberries complete the presentation with their naturally tart flavor. Their bright color stands out against the pale cream and golden pastry, creating a simple but attractive finish. You can place a raspberry on top of each filled horn or tuck a small berry into the tip before adding the remaining cream for a fruity surprise at the bottom.
How to Add a Chocolate Coating Inside the Pastry
Melt the Chocolate
Place the milk chocolate in a microwave-safe bowl and heat it in short intervals, stirring between each interval until it melts smoothly. Alternatively, melt it in a heatproof bowl set over a saucepan of gently simmering water. If using the second method, make sure the base of the bowl does not touch the water.
Stir the chocolate until no solid pieces remain. Avoid overheating it, as chocolate can become thick or grainy when exposed to excessive heat. Let it cool slightly if it is extremely hot, but use it while it is still fluid enough to move around the inside of the pastry cones.
Coat the Inside of Each Horn
Hold a cooled pastry cone at approximately a 45-degree angle and spoon a small amount of melted chocolate into the wider opening. Let the chocolate travel toward the narrow tip, then gently rotate the cone between your fingers so the chocolate spreads over the inner walls.
A cocktail stick or metal skewer can help move the chocolate into small dips and gaps in the baked pastry. Work carefully and avoid applying a very thick layer, as too much chocolate can make the coating heavy and leave less room for the cream. The aim is to create a thin, reasonably even lining.
Repeat with the remaining pastry horns, then place them in the refrigerator for around 10 minutes or until the chocolate has set. The coating should feel firm before you add the filling. This cooling step is particularly useful in warm kitchens, where chocolate can take longer to harden at room temperature.
Prepare the Whipped Cream Filling
Pour the cold double cream into a mixing bowl and add the icing sugar. Whisk using an electric mixer or a hand whisk until the cream reaches a semi-firm piping consistency. It should hold its shape when lifted with a whisk but remain smooth and soft enough to pass through a piping nozzle.
Check the texture regularly as you whisk. Overwhipped cream can become grainy and difficult to pipe neatly, so stop once it is thick enough to hold a defined shape. If you are preparing the cream ahead of time, keep it refrigerated until you are ready to assemble the pastries.
Transfer the whipped cream to a piping bag fitted with your preferred nozzle. A star nozzle creates a decorative finish, while a plain nozzle produces a smooth filling. Insert the nozzle into the wide opening of each chocolate-lined cone and pipe the cream toward the pointed end, then continue filling until the cream reaches slightly above the pastry edge.
Work gently to avoid cracking the pastry shells. If you do not have a piping bag, a sturdy food bag with a small corner cut off can be used instead, although the finish may look less decorative. Fill the cones shortly before serving whenever possible for the best contrast between crisp pastry and soft cream.
Decorate and Serve Your Cream Horns
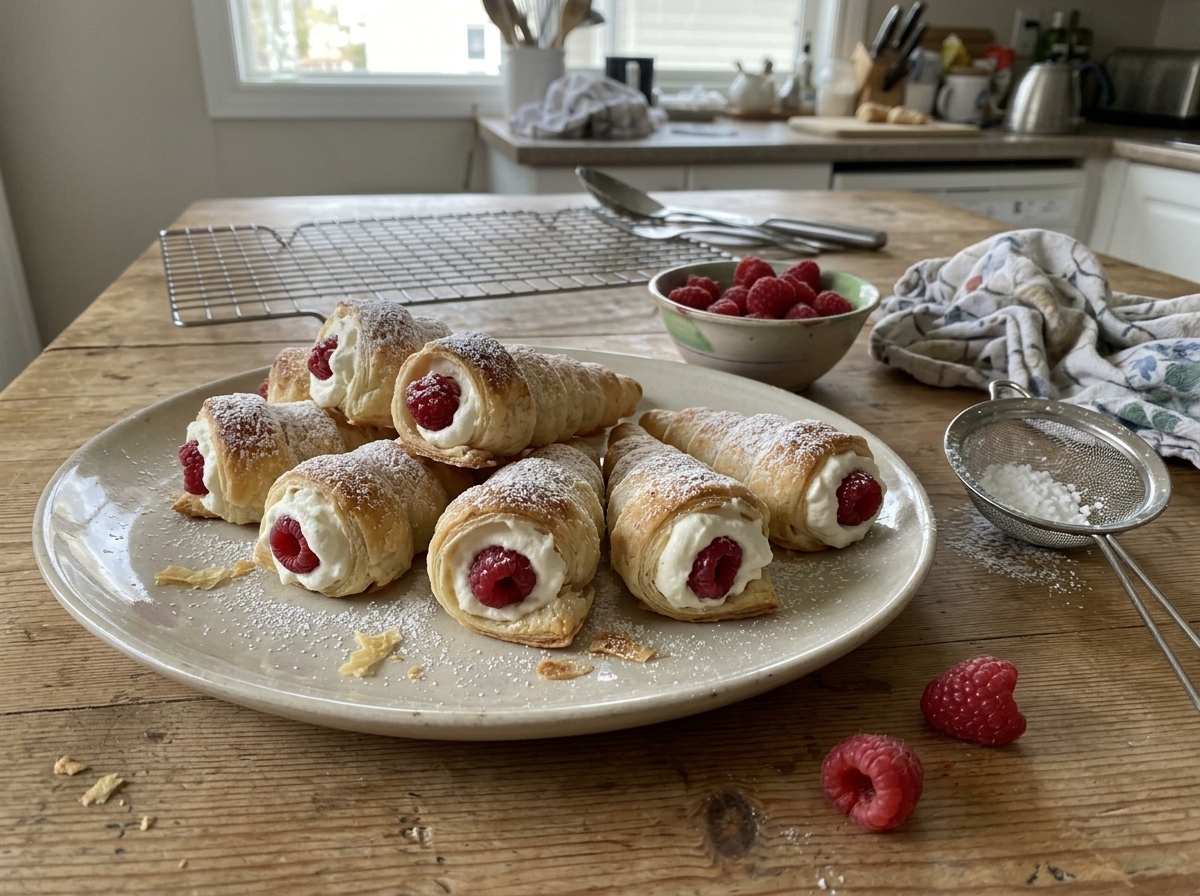
Fresh raspberries make a classic finishing touch for these gluten-free cream horns. Place one raspberry on top of each portion of cream, pressing it lightly into the filling so it stays in place. You can also position a small berry at the pointed end before piping in the cream to create a hidden fruit centre.
For other decorating ideas, try blackberries, blueberries, red currants, or thin slices of strawberry. Grated chocolate adds a simple finish without requiring additional preparation, while a light sprinkle of icing sugar gives the horns a traditional bakery-style appearance. If you are serving them at a party, choose one or two decorations that complement each other rather than overcrowding the delicate pastries.
Arrange the completed horns on a serving plate or dessert stand and serve them with tea or coffee. Their crisp shells and creamy centres make them a satisfying afternoon treat, but they also work well as individual desserts after a meal. For the best texture, fill them as close to serving time as your schedule allows.
Choosing the Best Gluten-Free Puff Pastry
The type of puff pastry you choose can affect how easily the cones are shaped and how much they rise in the oven. Ready-rolled gluten-free puff pastry is convenient because it eliminates the need to roll a block of dough to an even thickness. It also makes cutting consistent strips quicker, which is helpful when preparing several cream horns at once.
Use a product specifically labelled gluten-free and follow its storage and handling instructions. Different brands can vary in flexibility, fat content, and baking performance, so check the packaging for guidance about oven temperature and preparation. If the pastry is frozen, thaw it according to the manufacturer’s directions before unrolling it.
A block of gluten-free puff pastry can also be used, provided it is rolled evenly before cutting. Aim for a consistent thickness across the sheet so that all the strips bake at a similar rate. Handle the pastry gently and avoid adding excessive flour, which may change the surface texture or make the finished pastry dry.
If you are cooking for someone with coeliac disease or a strict gluten-free requirement, check the packaging of all ingredients and prevent cross-contact with gluten-containing flour, utensils, and baking equipment. Clean work surfaces and use suitable equipment to help keep the recipe appropriate for the intended diet.
Whipping the Cream for Too Long
Cream that is not thick enough can run out of the cones, while overwhipped cream may become grainy and difficult to pipe. Use cold cream and whisk gradually, checking its consistency as you work. Stop when it holds a soft but defined peak and can be piped without losing its shape.
Frequently Asked Questions About Gluten Free Cream Horns
Can I Make Gluten Free Cream Horns Without Special Moulds?
Metal cream horn moulds are the easiest way to achieve a consistent cone shape. If you do not have them, you can investigate suitable oven-safe alternatives designed for shaping pastry, but make sure the material is safe for the oven and can be removed without damaging the baked shells. The size and shape of the mould will affect baking time and the finished appearance.
Can I Use Dark Chocolate Instead of Milk Chocolate?
Yes. Dark chocolate can replace milk chocolate if you prefer a deeper cocoa flavor or want a less sweet coating. Check the product label if you need a dairy-free option, since not all dark chocolate is free from milk ingredients. Melt it gently and use the same method to coat the inside of each pastry cone.
Why Did My Cream Horns Lose Their Shape?
The cones may lose their shape if the pastry strips were wrapped too loosely, the overlaps were insufficient, or the pastry became too warm during preparation. Placing the loose pastry end underneath each cone on the baking sheet can help keep the strip secure. Using greased moulds and handling the pastry gently will also improve the results.
Can I Prepare Cream Horns the Day Before?
You can prepare and bake the pastry shells the day before and add the chocolate lining in advance. Store the completely cooled shells in a dry, airtight container. For the best texture, wait until shortly before serving to whip the cream, fill the cones, and add the fresh raspberries.
Can I Use Other Fruits Instead of Raspberries?
Absolutely. Strawberries, blueberries, blackberries, and red currants all work well with the cream and chocolate. Choose fruit that complements the sweetness of the filling, and dry it thoroughly after washing. Smaller berries are particularly convenient because they can sit neatly on top of the piped cream without making the pastry difficult to serve.
Are Gluten Free Cream Horns Suitable for Vegans?
They can be adapted for a vegan diet, but every ingredient must be checked. Choose gluten-free puff pastry without animal-derived ingredients, dairy-free chocolate, and a suitable plant-based cream alternative. Use maple syrup rather than honey in the coconut cream filling. The final result may have a slightly different texture from the traditional double-cream version.
Gluten-Free Cream Horns
Crispy gluten-free puff pastry cones filled with sweet whipped cream, lined with melted chocolate, and topped with fresh raspberries. A delicious teatime dessert that can also be adapted for dairy-free and vegan diets.
9
servings15
minutes12
minutes272
kcalIngredients
1 Jus-Rol gluten-free puff pastry sheet
100 g milk chocolate
150 ml double cream
2 tbsp icing sugar (confectioners’ sugar)
Granulated sugar, for sprinkling
9 raspberries, for decoration
Directions
- Prepare and Shape the Pastry
- Preheat the oven to 200°C (180°C fan). Line a baking sheet with baking parchment and lightly grease the cream horn moulds with oil.
- Cut the ready-rolled puff pastry lengthwise into 9 long, even strips.
- Brush the pastry strips lightly with water.
- Place the pointed end of a greased cream horn mould at the end of one strip. Wrap the pastry around the mould, overlapping each layer by approximately 0.5 cm.
- Keep the pastry within the ends of the mould so the metal cone can be removed easily after baking.
- Place each wrapped mould on the baking sheet with the loose pastry end facing down.
- Brush the exposed tops lightly with water and sprinkle with granulated sugar.
- Bake for 10–12 minutes, or until the pastry is puffed and golden.
- Leave the baked cones on the tray for about 5 minutes. Carefully remove the hot metal moulds, using caution to avoid burns.
- Allow the moulds to cool, grease them again, and repeat with the remaining pastry strips if baking in batches.
- Coat the Pastry with Chocolate
- Melt the milk chocolate in a microwave-safe bowl in short intervals, stirring between each, or melt it over a bowl of hot water.
- Hold a cooled pastry cone at a 45-degree angle and spoon a little melted chocolate inside.
- Gently rotate the cone to spread the chocolate around the inner walls.
- Use a cocktail stick or skewer to guide chocolate into any small gaps.
- Place the coated cones in the refrigerator for about 10 minutes, or until the chocolate has set.
- Prepare and Pipe the Cream
- Whip the double cream and icing sugar together until the mixture reaches a semi-firm piping consistency.
- Transfer the whipped cream to a piping bag fitted with your preferred nozzle.
- Pipe the cream into each chocolate-lined cone until it reaches slightly above the pastry edge.
- Decorate each horn with a fresh raspberry, or use another topping of your choice.
- Serve as soon as possible for the best contrast between the crisp pastry and creamy filling.
Notes
- Dairy-free cream: Use 1 tin of coconut milk containing at least 70% coconut, 1 tbsp set or cloudy honey, and ½ tsp vanilla extract. For a vegan version, use maple syrup instead of honey.
- Chill the coconut milk so the solid white cream separates from the liquid. Scoop out the solid portion and reserve the liquid for smoothies or another use.
- Whisk the coconut cream with the sweetener and vanilla until thick enough to pipe. The texture depends on the brand and how well the coconut milk separates.
- Dairy-free chocolate can be used for the chocolate lining. It may be thicker when melted, so use a cocktail stick to spread it into the pastry’s gaps.
- For the best texture, store unfilled pastry shells separately and add the cream and raspberries shortly before serving. Refrigerate filled cream horns because the filling is perishable.
- Other suitable toppings include strawberries, blueberries, blackberries, red currants, grated chocolate, or sprinkles.
Nutrition Facts
- Calories: 272kcal
- Fat: 20g
- Carbohydrates: 21g
- Fiber: 1g
- Sugar: 8g
- Protein: 3g
