Overview
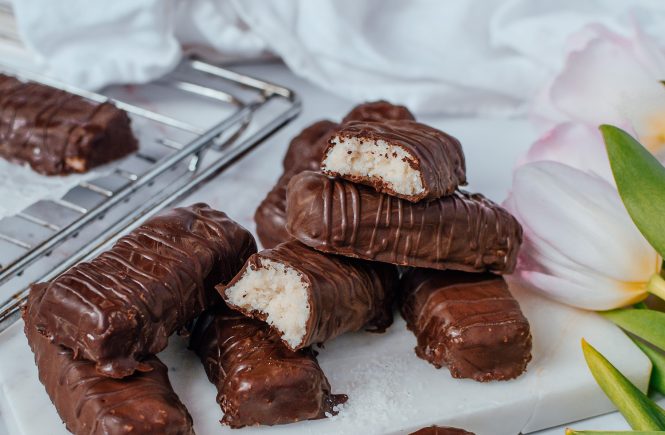
These homemade coconut chocolate bars are a delicious, healthier alternative to store-bought candy bars. Made with simple, low-carb ingredients like desiccated coconut, coconut cream, and sugar-free chocolate, they deliver a rich, creamy texture inside with a satisfying chocolate shell on the outside. They’re naturally gluten-free, refined sugar-free, and suitable for keto or low-carb diets.
The recipe is quick to prepare and requires minimal equipment. With just a short freezing time, you can have perfectly shaped coconut bars ready in about 30 minutes.
Recipe Details
- Preparation Time: 10 minutes
- Freezing Time: 20 minutes
- Total Time: 30 minutes
- Servings: 20 bars
- Calories per serving: ~169.7 kcal
Ingredients
For the Coconut Filling
- 2 cups unsweetened desiccated coconut
- 1/2 cup canned coconut cream (well-shaken, full-fat with at least 30% fat, at room temperature)
- 1/3 cup erythritol (or preferred sugar-free sweetener)
- 1/3 cup coconut oil (melted, but not hot—just at room temperature consistency)
For the Chocolate Coating
- 6 oz sugar-free chocolate chips
- 2 teaspoons coconut oil
- 1–2 drops monk fruit or stevia (optional, depending on your sweetness preference)
Equipment Needed
- Food processor
- 9×9-inch square pan
- Parchment paper
- Spatula
- Sharp knife
- Microwave-safe bowl
- Forks or dipping tools
Step-by-Step Instructions
Step 1: Prepare the Pan
Start by lining a 9×9-inch square pan with parchment paper. Make sure the paper slightly overhangs on the sides—this will make it easier to lift the coconut mixture out later. Set the prepared pan aside.
Step 2: Make the Coconut Mixture
In a food processor, combine the following:
- Desiccated coconut
- Erythritol
- Coconut cream (make sure it’s well mixed before adding)
- Melted coconut oil
Blend the mixture on high speed for about 1 minute. You’re aiming for a thick, slightly sticky coconut paste.
Important tip:
You may need to pause every 15–20 seconds to scrape down the sides of the bowl. This ensures everything blends evenly and prevents dry pockets.
The final texture should resemble a moist dough that sticks together when pressed between your fingers.
Step 3: Press Into the Pan
Transfer the coconut mixture into your lined pan.
- Use your hands first to spread it evenly across the base.
- Then use a spatula (or the back of a spoon) to flatten the surface smoothly.
Make sure to press firmly to remove any trapped air pockets—this helps the bars hold together better after freezing.
Step 4: First Freeze
Place the pan in the freezer for about 10 minutes.
Do not overfreeze.
If the mixture becomes too hard, it will crack or crumble when cutting. You want it firm, but still slightly soft.
Step 5: Cut Into Bars
Remove the pan from the freezer. Using the parchment paper overhang, lift the coconut slab out and place it on a cutting board.
Using a sharp knife:
- Cut into 20 evenly sized rectangular bars
Pro tip:
Warm the knife blade slightly (by running it under hot water and drying it, or briefly heating it) to get clean cuts without cracking.
Step 6: Shape the Bars (Optional)
For a more authentic “Bounty-style” look:
- Gently round the edges of each bar using your hands
- Smooth out any cracks or rough sides
This step is optional but improves presentation.
Step 7: Chill Again
Place the shaped bars onto a plate lined with parchment paper. Return them to the freezer while you prepare the chocolate coating.
Step 8: Melt the Chocolate
In a microwave-safe bowl:
- Combine the sugar-free chocolate chips and coconut oil
Heat in 30-second intervals, stirring in between, until the mixture is completely melted and smooth.
If desired, add 1–2 drops of monk fruit or stevia to increase sweetness. Mix well.
Step 9: Coat the Bars
Using two forks:
- Dip each coconut bar into the melted chocolate
- Ensure it is fully coated
Let excess chocolate drip off before placing the bar back onto parchment paper or a cooling rack.
Repeat for all bars.
Step 10: Final Freeze
Once all bars are coated:
- Place them back in the freezer for 10–15 minutes
This allows the chocolate shell to harden completely.
Step 11: Storage
- Store the bars in an airtight container in the refrigerator for up to 4 weeks
- Alternatively, freeze them for longer storage
Before serving:
Let frozen bars sit at room temperature for about 30 minutes to soften slightly.
Tips for Best Results
- Always use full-fat coconut cream for a rich texture
- Don’t skip pressing the mixture firmly—it prevents crumbly bars
- Avoid over-freezing before cutting
- Adjust sweetness depending on your preference
- Use high-quality sugar-free chocolate for better flavor
Nutritional Information (Per Bar)
| Nutrient | Amount | % Daily Value* |
|---|---|---|
| Calories | 169.7 kcal | — |
| Total Fat | 15.8 g | — |
| Saturated Fat | 11.2 g | 56% |
| Trans Fat | 0 g | — |
| Cholesterol | 7.3 mg | 3% |
| Sodium | 3.7 mg | 1% |
| Potassium | 46.2 mg | 2% |
| Total Carbohydrates | 6.8 g | — |
| Dietary Fiber | 5.6 g | 23% |
| Sugars | 0.8 g | — |
| Sugar Alcohols | ~3–4 g | — |
| Net Carbs | ~1–2 g | — |
| Protein | 0.7 g | 2% |
| Vitamin C | 0.1% | — |
| Calcium | 2.2% | — |
| Iron | 0.3% | — |
*Percent Daily Values are based on a 2,000-calorie diet.
Final Notes
These bars are perfect as a quick dessert, snack, or even a post-meal treat when you want something sweet without the sugar crash. The combination of coconut and chocolate makes them feel indulgent, while the low-carb ingredients keep them aligned with healthier eating goals.
If you want variations, you can:
- Add a few drops of vanilla extract for extra flavor
- Sprinkle shredded coconut on top before the chocolate sets
- Use dark or milk-style sugar-free chocolate depending on your taste
