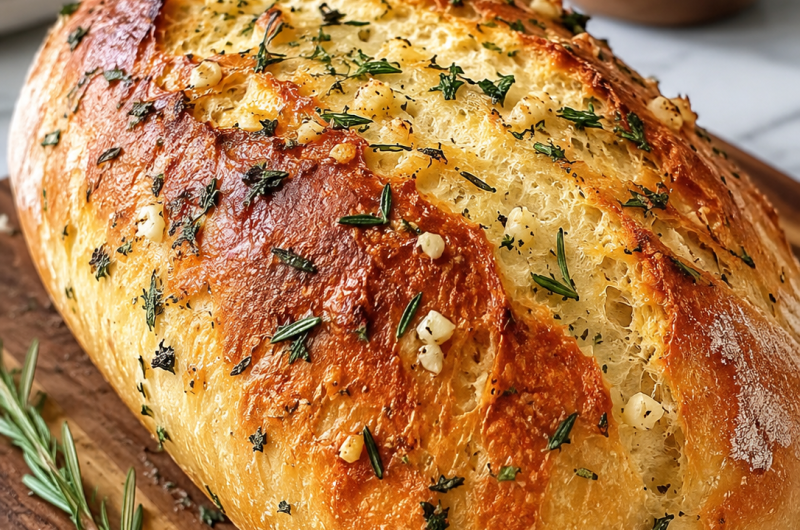

If you’ve always wanted to bake homemade bread but felt intimidated by kneading, this No-Knead Beer Bread is the perfect place to start. With just a handful of pantry ingredients, a can of beer, and a little patience while the dough rises, you’ll create a bakery-style loaf with a crisp golden crust and a soft, chewy interior.
The beer adds subtle flavor while helping the dough develop a beautiful texture. Whether you’re serving it alongside soup, chili, pasta, or simply enjoying it warm with butter, this rustic loaf is incredibly satisfying and surprisingly simple to make.
Even if you’re a first-time bread baker, this recipe delivers impressive results every time.
Why You’ll Love This Recipe
- No kneading required
- Perfect for beginner bakers
- Crispy artisan-style crust
- Soft and airy crumb
- Uses simple pantry ingredients
- Great with soups, stews, sandwiches, and toasted with butter
Prep & Cooking Time
- Prep Time: 10 minutes
- First Rise: 30 minutes
- Second Rise: 2 hours
- Final Rise: 30–40 minutes
- Bake Time: 35 minutes
- Total Time: About 3 hours 55 minutes
Servings: 15 slices
Ingredients
- 1½ teaspoons active dry yeast
- 4½ cups all-purpose flour, divided
- ½ cup warm water (about 100°F / 38°C)
- 1 (12-ounce) can or bottle of beer (room temperature)
- 1½ teaspoons fine salt
- Extra all-purpose flour for dusting
- 1 tablespoon cornmeal
Equipment Needed
- Large mixing bowl
- Rubber spatula
- Baking sheet
- Clean kitchen towel
- Sharp knife or bread lame
- Small loaf pan or oven-safe dish for water
- Cooling rack
How to Make No-Knead Beer Bread
Step 1: Activate the Yeast
In a large mixing bowl, combine the warm water, yeast, and ½ cup of the flour. Stir until smooth.
Cover the bowl with a clean towel or plastic wrap and let it rest in a warm place for about 30 minutes. The mixture should become bubbly and foamy, showing that the yeast is active.
Step 2: Make the Dough
Pour the beer into the yeast mixture.
Add the remaining flour and salt.
Mix everything together using a sturdy spoon or spatula until no dry flour remains. The dough will be sticky and shaggy—this is exactly what you want.
Avoid adding extra flour.
Step 3: First Rise
Cover the bowl again.
Allow the dough to rise in a warm place for about 2 hours, or until it has doubled in size.
The longer rise develops flavor while creating the airy texture typical of artisan bread.
Step 4: Shape the Loaf
Generously flour your work surface.
Turn the dough out using a rubber spatula.
Dust the top with flour and gently shape it into a round or oval loaf. There’s no need to knead—simply fold the edges underneath until the loaf holds its shape.
Step 5: Final Rise
Sprinkle the baking sheet with cornmeal.
Transfer the dough onto the prepared baking sheet.
Dust lightly with flour and loosely cover with a towel.
Let the loaf rise for another 30 to 40 minutes.
Meanwhile, preheat the oven to 425°F (220°C).
Step 6: Add Steam
Fill a small loaf pan or oven-safe dish with warm water.
Place it on the bottom oven rack while the oven preheats.
The steam helps create a crisp, crackly crust.
Step 7: Score the Bread
Using a very sharp knife or bread lame, cut one long slash across the top of the loaf.
This allows the bread to expand evenly during baking.
Step 8: Bake
Place the bread on the rack above the pan of water.
Bake for approximately 35 minutes, or until the crust is deep golden brown.
The loaf should sound hollow when tapped on the bottom.
If using an instant-read thermometer, the center should reach about 200–205°F (93–96°C).
Step 9: Cool
Transfer the bread to a wire cooling rack.
Allow it to cool completely before slicing.
Cutting into hot bread may result in a gummy texture.
Tips for the Best Beer Bread
- Use room-temperature beer for better yeast activity.
- Don’t overwork the dough—minimal handling keeps it light.
- Flour your hands and work surface well since the dough is sticky.
- Steam during baking creates a crisp artisan crust.
- Let the bread cool completely before slicing for the best texture.
Flavor Variations
Garlic Herb
Mix in:
- 1 teaspoon garlic powder
- 1 tablespoon dried Italian herbs
Cheddar Beer Bread
Fold in:
- 1½ cups shredded sharp cheddar cheese
Everything Bagel
Sprinkle everything bagel seasoning over the loaf before baking.
Jalapeño Cheddar
Add chopped jalapeños and shredded cheddar for a spicy twist.
Rosemary Parmesan
Mix fresh rosemary and grated Parmesan into the dough for a savory loaf.
Serving Suggestions
This rustic bread pairs wonderfully with:
- Homemade soups
- Beef stew
- Chili
- Pasta dishes
- Charcuterie boards
- Toast with butter and jam
- Grilled sandwiches
- Garlic bread
Storage
Store cooled bread in a bread bag or airtight container at room temperature for up to 3 days.
Avoid refrigerating, as it can dry out the bread.
Freezing
Wrap the cooled loaf tightly in plastic wrap and aluminum foil.
Freeze for up to 3 months.
Thaw at room temperature and warm in a 350°F (175°C) oven for about 10 minutes before serving.
Frequently Asked Questions
Can I use any type of beer?
Yes. Light lagers produce a mild flavor, while darker beers create a richer, more robust loaf.
Can I make this without beer?
Beer provides both flavor and carbonation. While you can substitute sparkling water or club soda, the finished bread will taste different.
Why is my dough so sticky?
That’s completely normal. No-knead dough is wetter than traditional bread dough, which helps create its airy interior.
How do I know when it’s done?
The crust should be golden brown, the loaf should sound hollow when tapped, and the internal temperature should reach around 200–205°F.
Can I add cheese or herbs?
Absolutely! Cheese, garlic, rosemary, thyme, chives, and everything bagel seasoning all work beautifully in this recipe.
Final Thoughts
This No-Knead Beer Bread is one of the easiest homemade bread recipes you’ll ever make. With minimal effort and no kneading required, you can enjoy a rustic artisan loaf featuring a crunchy crust, tender crumb, and rich flavor. Whether you’re new to bread baking or simply looking for a dependable everyday loaf, this recipe is sure to become a favorite in your kitchen.
