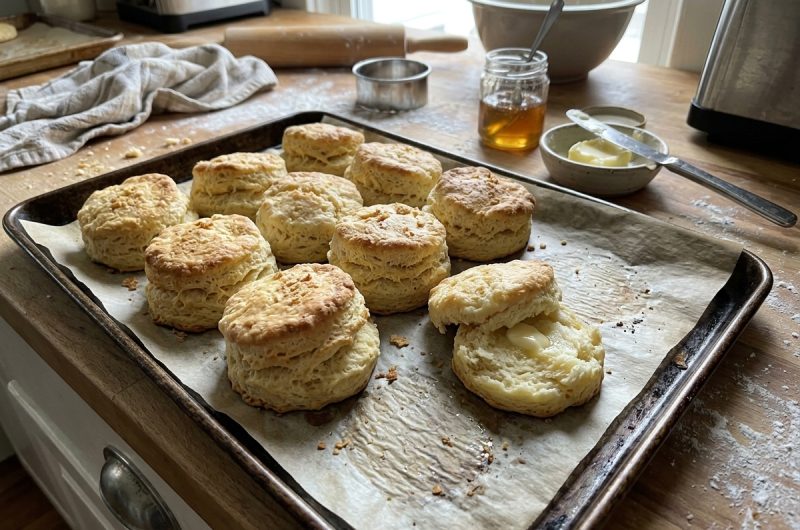

Homemade buttermilk biscuits are a delicious addition to breakfast, brunch, and family dinners. With a golden exterior, a soft center, and delicate buttery layers, these classic biscuits are easy to prepare using everyday baking ingredients.
This buttermilk biscuit recipe is ideal for home cooks who want fresh, fluffy biscuits without complicated techniques or special equipment. With just 15 minutes of preparation and about 13 minutes in the oven, you can make a batch of eight warm biscuits ready to serve straight from the kitchen.
The secret to making excellent homemade biscuits is to keep the butter and buttermilk cold, handle the dough gently, and create several layers before baking. These simple steps help produce a tender texture with flaky edges and a rich buttery flavor.
Baking powder and baking soda give the biscuits their lift, while a small amount of sugar balances the flavor without making them noticeably sweet. Whether you are preparing a comforting weekend breakfast or looking for an easy bread alternative to accompany dinner, these homemade buttermilk biscuits are a reliable choice.
What Makes These Buttermilk Biscuits Special?
One of the best things about this easy buttermilk biscuit recipe is that it does not require yeast, lengthy resting periods, or complicated kneading. Instead, the dough comes together with flour, butter, buttermilk, and a few pantry staples.
Once the ingredients are combined, a simple folding technique creates layers that expand during baking. This makes the recipe approachable for beginners while still producing biscuits with the tender crumb and buttery flavor that experienced bakers appreciate.
The use of freshly grated butter is particularly helpful because it distributes small pieces of cold butter throughout the flour mixture. As the biscuits bake in a hot oven, the butter melts and releases moisture, helping create a light, flaky texture.
The dough should remain slightly rough rather than perfectly smooth, so there is no need to spend extra time kneading it. By following the steps carefully, you can make biscuits that look appealing, feel soft inside, and taste freshly baked.
Another advantage is the versatility of these biscuits. Serve them with butter and jam for breakfast, split them and fill them with eggs, or pair them with sausage gravy for a hearty meal. They also work well alongside soups, stews, chili, roasted vegetables, and other comforting dishes.
Since the recipe produces eight biscuits, it is suitable for a small family breakfast or as a side for a shared meal. You can also prepare them when you want homemade bread without committing to a long baking process.
How to Make Buttermilk Biscuits from Scratch
Making buttermilk biscuits at home is straightforward when you follow the correct order and avoid unnecessary handling. Prepare the oven and baking sheet before mixing the dough, then work efficiently so the butter stays cold. The dough will not look perfectly smooth, and that is a good sign. Its slightly uneven texture helps preserve the small pockets of butter that contribute to the biscuits’ flaky layers.
Prepare the Oven and Baking Sheet
Preheat the oven to 425°F (220°C) and line a baking sheet with parchment paper. Allow the oven to reach the correct temperature before placing the biscuits inside, because the initial heat helps the dough rise and encourages the exterior to develop a light golden color. Preparing the baking sheet in advance also makes it easier to transfer the biscuits promptly after shaping. Keep the butter refrigerated or in the freezer until you are ready to grate it into the dry ingredients.
Combine the Dry Ingredients
Add the all-purpose flour, baking powder, granulated sugar, baking soda, and salt to a mixing bowl. Whisk them together until the mixture appears uniform, paying attention to any small clumps of baking powder or baking soda. Even distribution is important because these ingredients help the biscuits rise during baking. Taking a moment to mix them thoroughly at this stage reduces the need for additional stirring later, which helps prevent the dough from becoming tough.
Incorporate the Grated Butter
Use a box grater to grate the very cold butter directly into the flour mixture. Stir gently so the butter strands become coated with flour and spread throughout the bowl. If you do not have a grater, a pastry cutter can be used to work the butter into the dry ingredients instead. The goal is to retain small pieces of butter rather than blending everything into a fine, uniform powder. Work quickly, especially in a warm kitchen, to keep the butter from softening.
Add the Buttermilk
Pour the cold buttermilk evenly over the flour and butter mixture. Use a wooden spoon or another sturdy spoon to stir until the ingredients are moistened and begin to cling together. Avoid beating the mixture or continuing to stir once the dough starts forming. It may still look rough and uneven in the bowl, but adding extra flour or mixing excessively can make the finished biscuits dry. The next step will bring the dough together without requiring traditional kneading.
Fold the Dough to Create Layers
Transfer the dough to a clean surface lightly dusted with flour. Use your hands to gently gather it into a loose mass, then flatten it into a rectangle about one inch thick. Fold the dough over itself, flatten it gently, rotate it a quarter turn, and repeat the folding process five to six times. These folds help create the layers that make flaky buttermilk biscuits so appealing. Keep your movements gentle and efficient, and avoid pressing the dough more than necessary.
Cut the Biscuits
After folding, gently flatten the dough to a thickness of approximately one inch. Use a round biscuit cutter measuring about 2½ inches across to cut the biscuits. Press the cutter straight down rather than twisting it, because twisting can compress the edges and interfere with an even rise. Place the cuts close together to minimize leftover dough. Gather the remaining scraps gently and reshape them only as much as needed to cut additional biscuits. Biscuits made from the scraps may have a less uniform appearance, but they can still taste excellent.
Bake Until Lightly Golden
Arrange the biscuits on the prepared baking sheet, leaving about one inch between them. Place the tray on the center rack of the preheated oven and bake for approximately 13 minutes, watching for the tops to begin turning light golden brown. Oven temperatures can vary slightly, so check the biscuits near the end of the baking time. They should look risen and set rather than wet or doughy on top. Avoid baking them for longer than necessary, as excessive baking can dry out the tender centers.
Cool Briefly and Serve Warm
Remove the biscuits from the oven and allow them to rest on the baking sheet for several minutes before serving. This short cooling period makes them easier to handle while allowing the crumb to settle. Buttermilk biscuits are especially enjoyable while warm, when the butter flavor is pronounced and the centers remain soft. Serve them plain, split with a little butter, or alongside your favorite breakfast and dinner dishes. For the best texture, enjoy them soon after baking.
Tips for Making the Best Homemade Biscuits
Keep the Ingredients Cold
Cold ingredients are one of the most important factors in making flaky buttermilk biscuits. Butter that stays firm during mixing creates small pockets throughout the dough, which help form distinct layers as the biscuits bake. If your kitchen is warm or the butter begins to soften, return it to the refrigerator briefly before continuing. Keeping the buttermilk cold also helps maintain the dough’s temperature, making it easier to handle and shape without losing the desired texture.
Measure the Flour Carefully
Too much flour can make biscuits heavy, dry, and difficult to bring together. Weighing the flour is the most consistent approach, particularly when baking recipes that depend on a delicate balance of dry and wet ingredients. If you are using measuring cups, avoid scooping directly into a packed bag of flour. Instead, spoon the flour into the cup and level it with a straight edge. Correct measurement allows the buttermilk to hydrate the dough properly and helps produce soft, tender biscuits.
Avoid Overworking the Dough
Unlike bread dough, biscuit dough does not need extensive kneading. Too much handling can develop excess gluten, making the biscuits firm instead of tender. Bring the mixture together gently, perform the folds with light pressure, and stop once the dough is ready to cut. A slightly uneven surface is perfectly acceptable. The aim is to create enough structure for the biscuits to hold their shape while preserving the delicate texture that makes homemade biscuits different from dense bread rolls.
Press the Biscuit Cutter Straight Down
When cutting biscuits, press the cutter firmly into the dough and lift it without twisting. Twisting can seal or compress the edges, potentially preventing the biscuits from rising as freely. A clean, straight cut helps maintain their shape and supports an even bake. If you do not have a round cutter, a sharp knife can be used to cut square biscuits instead. This also reduces leftover scraps, although the final shape will differ from traditional round buttermilk biscuits.
What to Serve with Buttermilk Biscuits
Breakfast and Brunch Ideas
Fresh buttermilk biscuits are a natural choice for breakfast because they pair well with both sweet and savory toppings. Serve them with butter and fruit jam, honey, scrambled eggs, or a simple cheese filling. For a heartier breakfast, split a biscuit and add a cooked egg or another favorite breakfast filling. Their mild flavor makes them easy to combine with different ingredients without overwhelming the rest of the meal. They are also a welcoming addition to a weekend brunch spread.
Savory Main Dishes and Comfort Food
These biscuits are equally useful at lunch or dinner. Their buttery flavor complements sausage gravy, homemade chili, hearty beef stew, and creamy soups. You can place them in a bread basket alongside roasted vegetables or serve them with a family-style meal as an alternative to dinner rolls. Because the biscuits are tender and easy to split, they are also useful for soaking up flavorful sauces and gravies. Their versatility makes this recipe worth keeping on hand for everyday meals as well as special gatherings.
Sweet Toppings and Simple Desserts
Although these biscuits are designed to be savory-leaning, their subtle sweetness makes them suitable for simple sweet treats. Spread a warm biscuit with butter and strawberry jam, or add a drizzle of honey for a quick snack. You can also serve them with fresh fruit for a relaxed breakfast or afternoon treat. The biscuits are not intended to be cake-like or heavily sweetened, so toppings provide an easy way to adjust the flavor to suit your preferences.
Frequently Asked Questions About Buttermilk Biscuits
How Are Buttermilk Biscuits Different from Regular Biscuits?
Buttermilk biscuits use buttermilk instead of ordinary milk or another liquid. The acidity of buttermilk interacts with baking soda, helping the dough rise while contributing a gentle tang and tender texture. Regular biscuits can also be light and flaky, but their flavor and texture depend on the liquid and leavening ingredients used. In this recipe, the combination of cold butter, buttermilk, baking powder, and baking soda creates a distinctive balance of buttery richness and softness.
What Is the Secret to Flaky, Fluffy Biscuits?
The most important techniques are keeping the butter cold, measuring the flour accurately, folding the dough several times, and avoiding excessive mixing. The folding process builds layers, while the cold butter helps preserve them until baking begins. A hot, fully preheated oven encourages the dough to rise quickly. Following these steps is more important than making the dough look perfectly smooth. With careful handling, even a beginner can produce tender biscuits with a lightly golden exterior and a soft interior.
Can I Make Buttermilk Biscuits Ahead of Time?
Yes, you can prepare the dough shortly before baking, provided you keep it cold and avoid leaving it at room temperature for an extended period. For the best texture, shape the biscuits and bake them when you are ready to serve. You can also bake them in advance and reheat them gently before eating. Since the biscuits are best when freshly baked, preparing them close to mealtime generally gives the most satisfying result.
Why Did My Biscuits Turn Out Dense?
Dense biscuits can result from adding too much flour, overmixing the dough, using butter that has become too warm, or allowing the oven to remain below the intended temperature. Twisting the biscuit cutter may also affect the rise. To improve your next batch, measure the ingredients carefully, keep the butter and buttermilk cold, and handle the dough only as much as necessary. Make sure the oven is fully preheated before baking so the biscuits receive the heat they need to rise.
How Should I Store Leftover Biscuits?
Allow leftover biscuits to cool before placing them in an airtight container. They can be stored at room temperature for up to three days, as specified in the original recipe. For a softer texture when serving again, warm them briefly in the oven. Avoid sealing them while they are still hot, because trapped steam can create unwanted moisture. If you know you will not eat the biscuits within a few days, freezing is another practical option for longer storage.
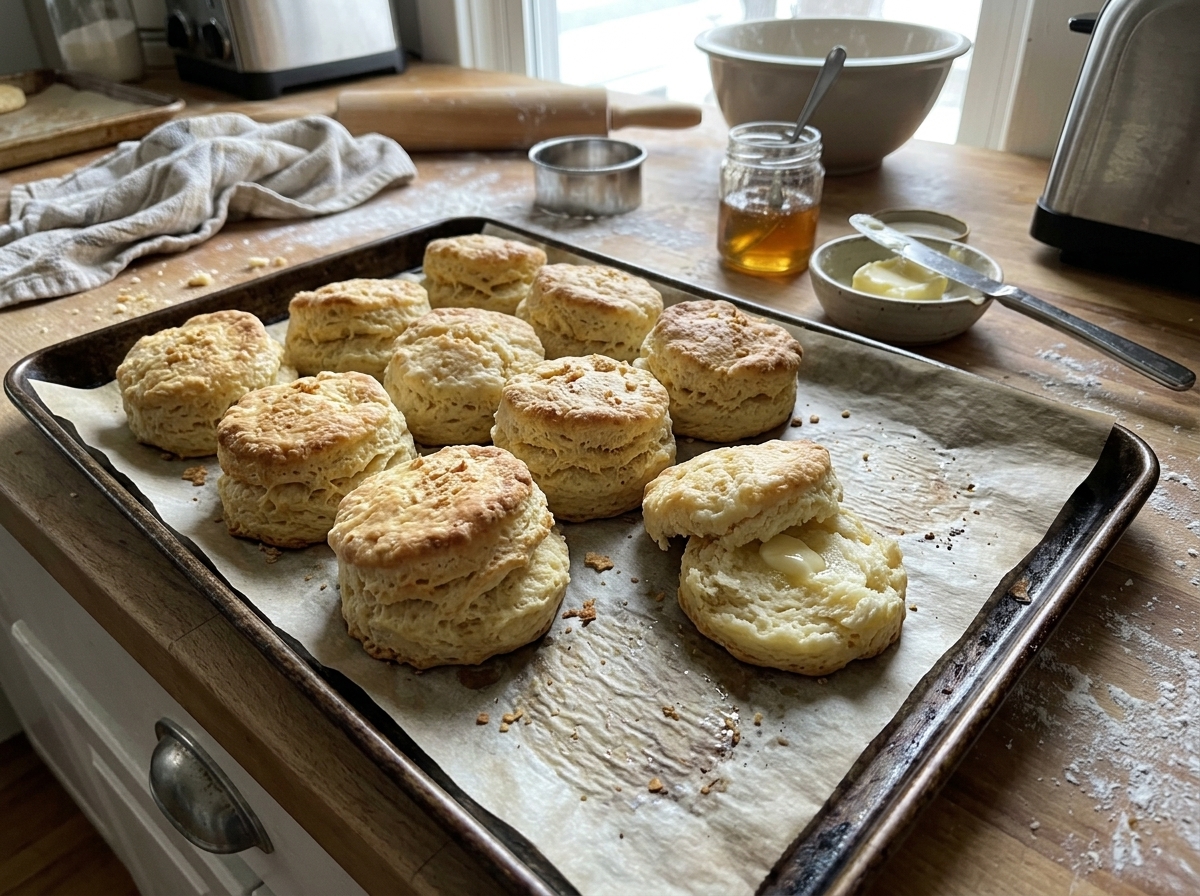
Buttermilk Biscuits Side Dish
These homemade buttermilk biscuits have a flaky, buttery exterior and a soft, tender center.
8
servings15
minutes13
minutes232
kcal28
minutesIngredients
2 cups (250 g) all-purpose flour
2 teaspoons baking powder
2 teaspoons granulated sugar
¼ teaspoon baking soda
1 teaspoon table salt
8 tablespoons (113 g) unsalted butter, very cold
¾ cup (177 ml) buttermilk, cold
Directions
- Preheat the oven.
Set the oven to 425°F (220°C). Line a baking sheet with parchment paper and set it aside. - Mix the dry ingredients.
In a medium mixing bowl, whisk together the flour, baking powder, sugar, baking soda, and salt until evenly combined. - Add the butter.
Grate the cold butter into the flour mixture using a box grater. Stir gently to distribute the butter throughout the dry ingredients. Alternatively, use a pastry cutter. - Pour in the buttermilk.
Drizzle the cold buttermilk over the mixture. Stir with a wooden spoon until the ingredients are moistened and begin to cling together. - Bring the dough together.
Transfer the dough to a clean, lightly floured surface. Gently gather it together with your hands without kneading it excessively. - Fold to create layers.
Flatten the dough into a rectangle about one inch thick and fold it over itself. Flatten gently, rotate it 90 degrees, and fold again. Repeat five to six times, working quickly to keep the butter cold. - Cut the biscuits.
Flatten the dough to approximately one inch thick. Use a 2½-inch (6.3 cm) round biscuit cutter to cut the biscuits, pressing straight down without twisting. Gently reshape the scraps to cut additional biscuits. - Bake.
Place the biscuits on the prepared baking sheet, spacing them about one inch apart. Bake on the center rack for approximately 13 minutes, until the tops begin turning light golden brown. - Cool and serve.
Allow the biscuits to rest for several minutes before serving warm with butter, jam, gravy, or your favorite meal.
Notes
- Keep butter and buttermilk cold for flaky biscuits.
- Avoid overmixing the dough.
- Store in an airtight container at room temperature for up to 3 days.
- Serve warm for the best taste and texture.
Nutrition Facts
- Calories: 232kcal
- Fat: 12g
- Carbohydrates: 26g
- Fiber: 1g
- Sugar: 2g
- Protein: 4g
